Showing posts with label tutorial. Show all posts

How to Clean Bakelite or Catalin

I am not a collector of Bakelite. I do enjoy looking at Bakelite jewelry, but don't own any myself. I generally don't have the kind of money required to purchase a Bakelite object. But, I do acquire Bakelite household products. Though I have not tested it, I assume that most of my older clocks, and my telephone are Bakelite. I decided that I should clean up some of my items, but didn't know the first thing about it. Generally, with other items, I find that glass cleaner works great. It takes off the dirt, and doesn't harm most products. I can generally get most items pretty clean with a little elbow grease. But, have left my plastic products alone.

After deciding this is something I should know, I did a little research and found that original Bakelite was generally used for household products and electronics for its heat resistant qualities. It was also typically made into black or brown objects. Bakelite is made from phenol and formaldehyde, the latter being one of the smells a product emits when subject to warm temperatures. The Bakelite resin is filled with materials such as sawdust or asbestos and fired and a high heat. The final product is a thin finish with a high gloss. 

Catalin is a form of Bakelite resin. Catalin is usually made into jewelry. It is a created using a similar process, except it does not have the fillers and is baked at lower temperatures. It is a transparent material that can be dyed or marbled. It can be filed and polished, which Bakelite is to fragile to do. This type of product can be cleaned with any household cleaner, and will not ruin the object. But, Bakelite needs a special touch. 

1. The first step to cleaning Bakelite is to wiped it down with a damp cloth or toothbrush to loosen any dirt collected on the case.  Bakelite cannot be cleaned with anything alkali or ammonia cleansers. Nor should alcohol be used. A dish liquid that does not have ammonia in it can be used to remove dirt.  There are specialty cleansers out there, but a liquid metal polish will work.

2. After wiping the item down, apply a small amount of the metal cleaner to a clean cloth. Using a firm circular scrubbing motion, wipe the entire object. 

3. Allow the polish to sit until it is dull and cloudy.

4. Buff with a clean cloth to remove the residue of the cleaner. These steps can be repeated until the object is clean. 

Now, I'm off to the store to buy some cleanser!

Image from Tube Radioland


Image from Due Time


Information taken from Rediola Guy and Wikipedia.

Setting My Hair to Get Some Sleep

I've been apprehensive about doing a hair tutorial as I feel like I know far less than the other lovely vintage bloggers out there. But, I've come across a couple things lately that have encouraged me to give it a shot. I set my hair in many various ways. I'm not great with my pin curls, though. I haven't had a lot of time to practice them. So, I usually take the easy way out - curlers. The type of curlers I use is dictated by the type of curl I am after. A lot of times, it also depends on what I plan on wearing. A third consideration is how much sleep I need. I have found that though bobby pins are fairly easy to  sleep in, I still wake up with the pins poking my head. 

Many times the method I use is rag curlers, or in my case sock curlers. They are very pliable, which makes sleeping in them quite easy. They do give me a looser and less full curl. So, I rarely am able to pin up the set for a more typical 50s look. Below is a step by step on how I set my hair in socks. I hope you find this tutorial useful. Please, feel free to leave me comments or suggestions. 

Setting hair using socks.

The hair needs to be almost completely dry or the hair will still be damp in the morning. There are two ways I start my hair depending on whether I need to wash it. Sometimes I wash my hair, spray it with my setting solution, and then blow dry it until it is almost dry. If I do not need to wash my hair, I start off with dry hair, and spray each section with setting solution.

I start off by sectioning off the front part of my hair, between my temple and my ear. I use this amount as a guide for the rest of the sections. If you want more of a wave, then more hair can be sectioned off. 


I cannot get my ends to behave. No matter how I try to set my hair, or how my hair is cut, I get stubborn ends that stick out. So, I use perm or end papers to keep them under control. For this example, I had washed and dried my hair. So, I typically dampen the end papers before placing them on the hair. I wrap the ends around the center part of the sock.


I then roll my hair up (under) to the crown of my head. I suppose you can roll your hair outward, though I have never done it this way.


When I get to the top, I tie the sock in a knot over my hair. I continue to the next section, typically switching from the left side of my head to the right side until I meet in the back. 


For this example, I did the first front section in one row, the second front section in two rows, and the rest in three rows from the top of my head to the nape of my neck. 


sock, rag, curlers, hair setting, easy, tutorial, vintage, 1950s, 1940s


I look a little like Medusa when I am finished. I do not bother to cover my hair in a scarf. The socks hold my hair well, and the length of my hair does not require any extra support.


If my hair was dry enough when I set it, I don't have to worry about the curls being damp. I untie the socks with ease and much faster than taking out pins or curlers.


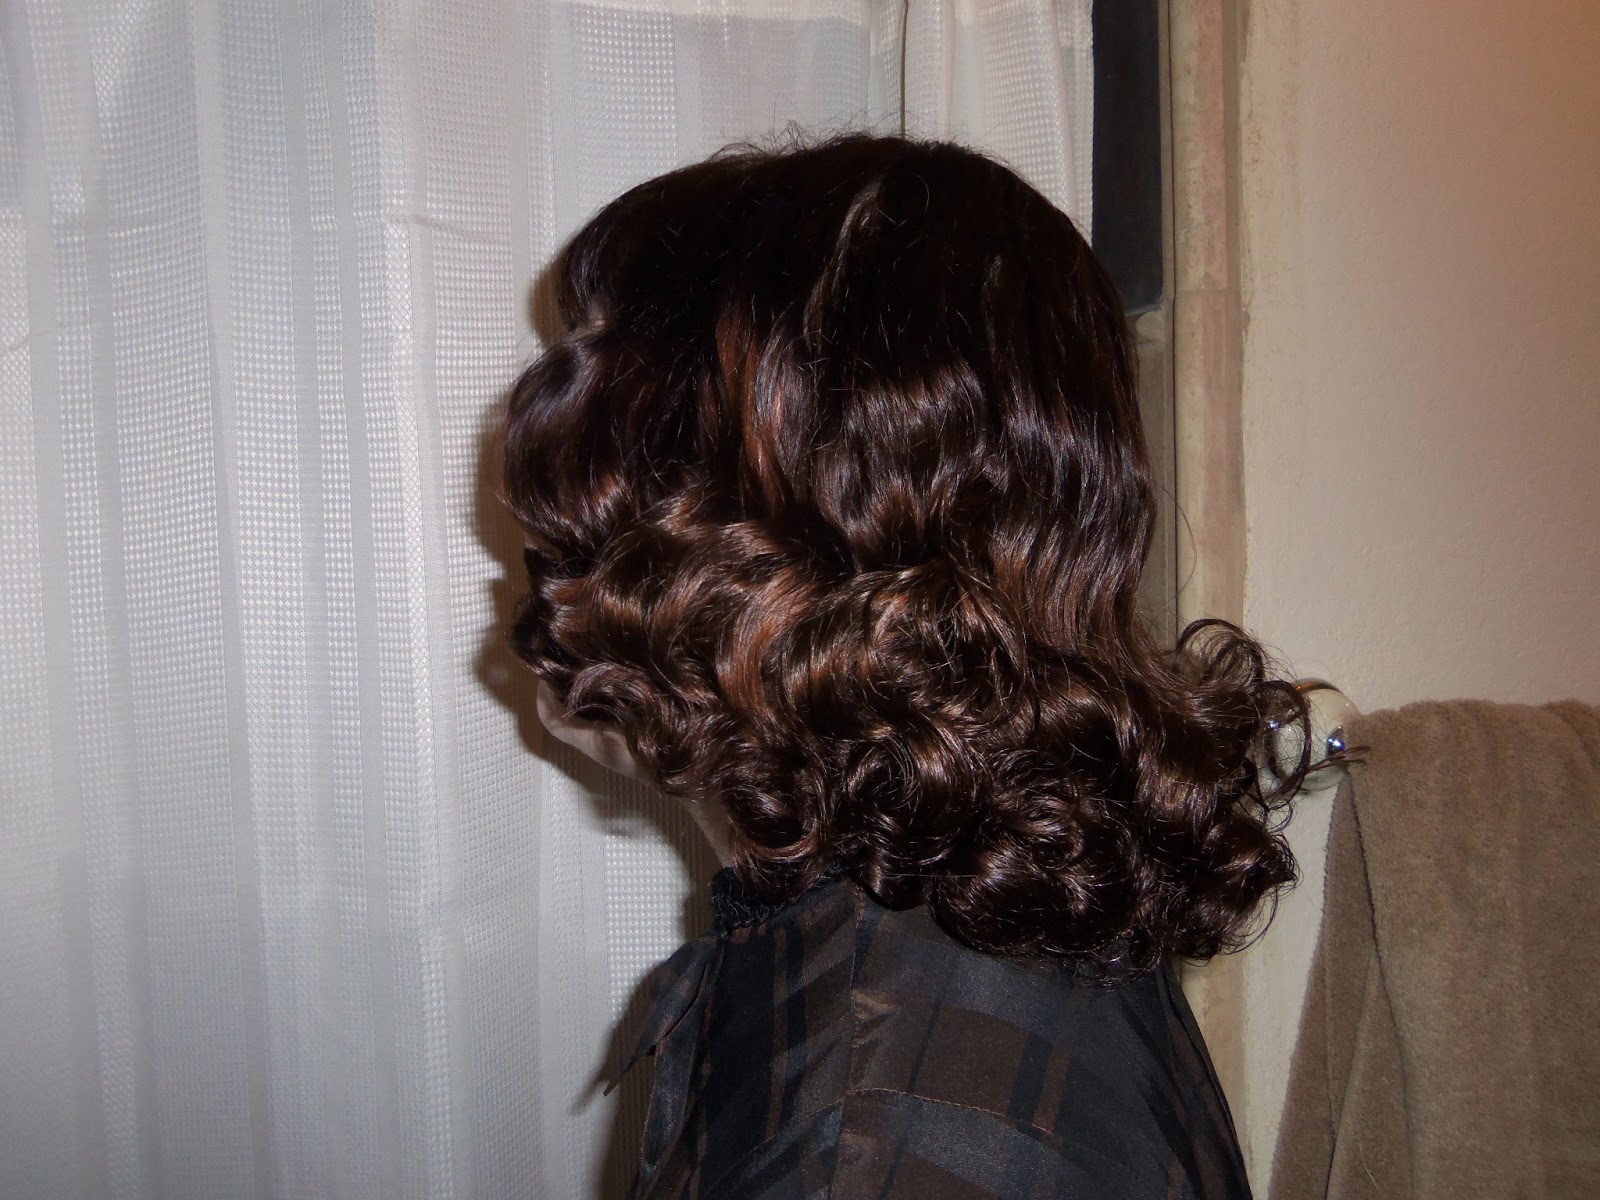
I don't spend a lot of time brushing out my hair, since I typically don't have a lot of time. Most often for this set all I need to do is brush it out and spray it with hairspray.


Viola. All done. Since I have fine hair, a wet set holds better in my hair than using heating styling tools. I do find that if I don't pin my hair, this style will loosen a bit over time, but even by the next morning I still have quite a bit of curl in my hair. Again, I would love to know what you think. Feel free to leave me a comment below.