Showing posts with label hair. Show all posts

Hair. More Hair. Always About Hair.

I haven't been doing much of anything lately. With wanting to spend time with my kitten, and shortage of funds, I've just been spending a lot of time at home. It's actually been quite nice. I've been less stressed out, and getting way more sleep. But, it also makes for a boring blog. Since I don't go anywhere, I've been concentrating mostly on my hair. 

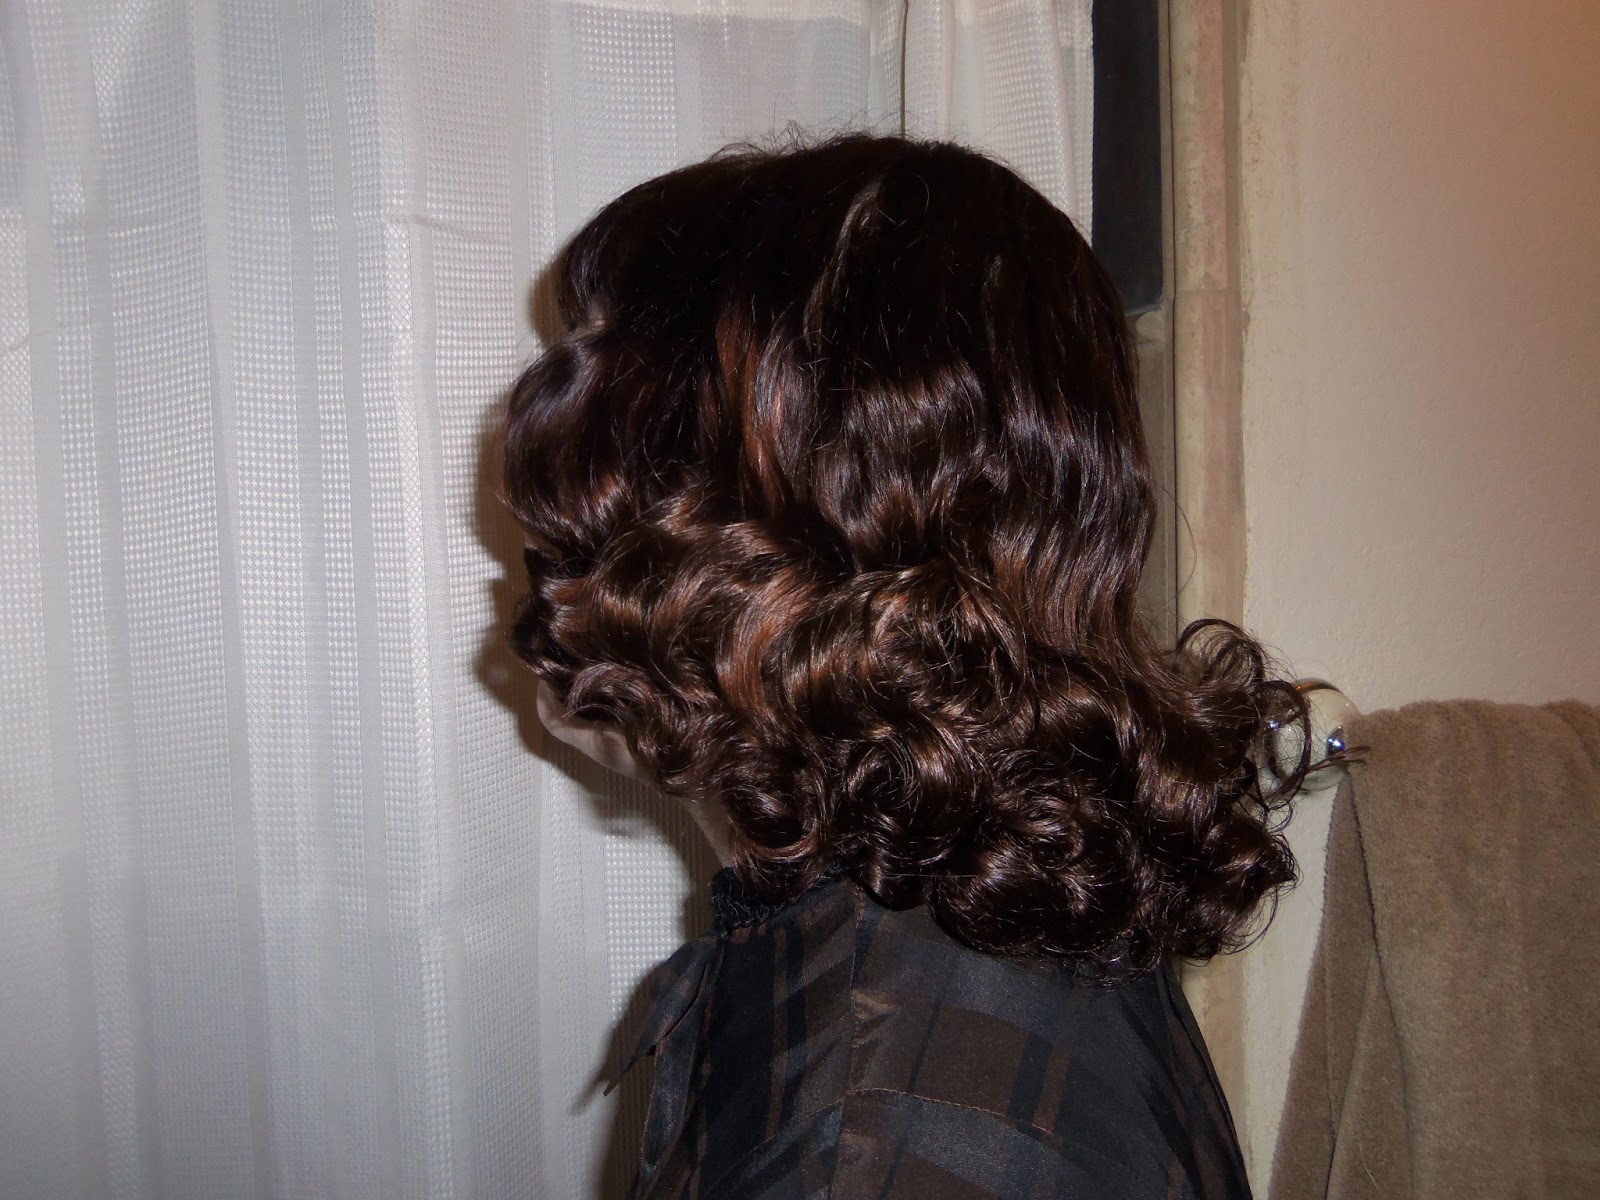
This time I wanted to see if I could create a pin curl setting with curlers. I chose the setting that I used in the last post laying out my curls just like the diagram pictured. The only exception was that I had to use three rows of curls in the back instead of two otherwise my hair would never dry. The problem I ran across was that I didn't have the correct size rollers. I needed slightly bigger ones than I used for the front, and slightly smaller ones than I used for the back. I ended up having to go over parts of the back with a curling iron.

I also realized that a curler set doesn't relax as much as a pin curl set. Having such springy curls can be a good thing, or it can be a hindrance. In this case, since I wanted the hair to be less springy, and just curl under, it was a hindrance. Even though it didn't turn out very close to the picture, I still liked the difference in curl from the front to back. 


This day I was invited over a friends house for dinner. I do like these types of invites, because I can still dress up, but it doesn't cost me as much as going to dinner at a restaurant. It is also easier to have conversation with my friends. The weather is weird in San Francisco normally, but this year it is even weirder. We had a long heat spell a couple weeks back. Now, it's fairly cool, which is what I'm used to. I pulled out these pants that I have never worn before, mostly because I wasn't brave enough to pull off this bright pattern. But, without anything else to wear, I sucked it up and wore them out. I got a few looks, but not as much as I thought I'd get (though I felt like I should be golfing). They are quite comfortable too. I was a bit cold, though. So, they may not come out again until the weather gets better.


Another Setting Trial

I have been trying almost every day to do pin curls so that I can improve. I'm having a hard time getting my hair smooth. Most often I have a sort of dent in my hair before the curls start. And, sometimes the curls aren't really round, but kind of square. But, I keep trying.

This next set I tried was picked out by Tony Curtis (with a little help from Janet Leigh). It is the headliner (pun) for the section "...hairstyles for the young married." Now, I probably wouldn't be considered  young by 1957 standards, and I am not married, but I thought I'd try it anyway. The hair in the photo is a bit shorter than mine, and the bangs are a bit longer. So, my hair turned out slightly different (actually my hair turned out very similar to all the other settings I've done without instructions). 

I don't usually set my bangs, but thought I'd play along with the instructions. It called for "a row of barrel curls for the bangs." Since my bangs are too short to curl in a barrel row - or stand up curl - I decided to use 5/8" perm rods. Though one fell out, and I had to fight some hair that was sticking straight up, I actually rather liked the outcome.

The rest of the instructions were a little vague, especially for a newbie. It states to set the hair in "a halo of pin curls, loosely set, for the sides and back..." Well, I don't know how to loosely set my hair with out it falling out. So, I set it normally, which is probably much tighter than they meant. The diagram shows a column of three pin curls on top of the ear, and four in the next column. The back has two rows of pin curls, which I didn't do the exact amount (the diagram shows five). 

I was actually surprised that I got somewhat close to the picture of the final product. I think that once I figure out how to smooth out my hair toward the crown, that my settings will look a lot better.


hair setting instructions vintage 1950s


Here you can see the hair that kept trying to stand up.


I first tried to take pictures on the roof of my building, but it was much too windy. I wanted to show you the fantastic view from where I live. Actually, the apartments above mine have the view of the Golden Gate Bridge, but I have a view of the back of another building. I don't really mind though. I've made up for it by putting some plants outside my window.

I got to wear this quilted dress that I bought from a friend of mine.  A mutual friend was having a trunk show, and was able to show case some of the vintage clothes she didn't wear anymore. Though I didn't get to attend, I spotted this dress in a photo from the event. It hadn't sold, and of course I couldn't pass it up. It is a lovely sleeveless dress with a full skirt perfect for these summer days in San Francisco.


I didn't know that I could completely block the view of the Golden Gate!

I Did It!

After the last few frizzy disasters attempting pin curls, I did some research to figure out what I was doing wrong. I understood the concept, but the execution was the hard part. My hair stylist gave me his practice head when I first decided I was going to give this a shot. I suppose that I would have been more successful had I tried it more than once on the head. But, after doing a good job on the practice head, I was even more frustrated that I couldn't do them on my own head. So, I gave up completely, opting for curlers instead.

Occasionally, I'd try one curl, get frustrated, and again set my hair with what I knew how to do. One time I even set the front of my hair in pin curls, finishing the back with curlers after getting fed up.  A few weeks ago, I decided that I needed to learn this. I was tired of the sleepless night, sore scalp, and stiff necks of sleeping in rollers. 

Since I couldn't roll my hair without some help, I found a small piece of plastic piping. I wound my hair up, then slipped it out when I got to my scalp, and pinned it to my head. That attempt left me with a much larger curl than I had planned. It was also pretty frizzy. Fortunately,  the wind finished off the rest for me.

In the last post I chronicled my next attempt. This time I used a smaller tube, and tried to follow a pattern. Again, my hair turned out pretty frizzy. My attempts in brushing out the frizz did little. It was hard to find an exact reason for my problem. A search led to taming already frizzy hair with pincurls, how to do pin curls, but nothing on what causes the frizz after the pincurl.

After searching for a while, I finally found the answer. The end of the hair MUST be in the center of the curl, not floating on the outside. I realized that by rolling my hair in a tube and then slipping it off, it was causing my ends to be on the outside of the curl. With this knowledge I decided to forgo the tube, and try freehand which had caused me so many problems before.

You know what? It worked. I rolled my hair in less time than it took me with the tubes. I half followed a pattern, though my ending result didn't look like anything in the pictures. I did a cluster of forward pincurls around my ear, and a double row of three pincurls in the back. I knew as soon as I took the curls out that I did a better job than before. When I brushed them out, I was so happy, that I did a verbal, YES! I'm sure my neighbors thought I was quite strange. 

I am still happy with the results of my hair. It did take a little more brushing out than it takes when I set with curlers, but that's ok. I know how to do it now. My sides never completely match as I have more hair on one side of my head than the other. But, now that I can set my hair this way, I can work on learning how placement and direction effects the style. 


Don't Follow My Example - Setting Pattern Instructions

As mentioned previously, I bought a fabulous magazines with pages and pages of setting instructions. Many looked pretty easy. Since this would mark the third time I'd be trying pin curls on my own head, and don't really have the knack of them yet, I thought these patterns would be a good way for me to get some practice. The first pattern I picked out was one with fringe, since that would obviously work with what I have. It looked about the right length with my newly cut hair as well. I laid out the magazine, bobby pins, rat tail comb, and my end papers (which I need to keep my ends in place), and stared in the mirror trying to figure out where to start.

Typically, I rush through setting my hair, since I can practically put curlers in while half asleep. But, with lack of experience, and wanting to really do a good job, I took my time setting my hair. The setting calls for forward pin curls in a single layer along the ear, and a double layer in the back. I did my best to follow the picture, but knew I wasn't placing them quite right. It wasn't until I brushed out my hair that I realized how off I was. The right side of my head had curls starting above my ear, while the left side of my head had curls starting mid ear. But, I did my best to brush my hair out like the girl in the picture.

dolled up desirae, pin curls, 1950s, 50s


When I set my hair a couple weeks ago with pin curls, my hair became very frizzy. I thought this was because my ends were so damaged, though this doesn't happen when I use rollers. So, I went off right away to cut as much of the damaged ends as I could (about two inches). Yet, my hair still came out frizzy with this setting. I'm not quite sure what I'm doing wrong. But, I am hoping that practice will make perfect in this situation (unlike my cat eye liner).


The frustration didn't stop with my hair. I planned on wearing this dress with a sun hat that I have not yet worn. The day before was quite warm and very sunny.  I thought that it was perfect weather for a nice straw hat. But, this day was overcast and rainy! I tried to make it better by posing in front of a sunny mural. Unfortunately, I didn't get to take a picture with my pretty green hat.


How to Be Glamorous in 90 Minutes

This is the third and final installment on how to be glamorous with limited time. 


  • You'll have time to add a switch of hair or experiment with your accessories.  But, if you do decide to wear a chignon, or sport a tiny tiara, don't overload the glamour so that you'll be weighed down by it. A simple hair-do allows you to indulge in striking and even huge accessories.  But, put a heavy switch together with fussy bangs, cascade rhinestone earrings and a heavy rhinestone necklace, and what do you have?  A walking jewelry shop.
  • There's a large selection of hair ornaments that are not only glamorous but practical, too.  If your hair has a tendency to wisp so that even a fixative doesn't help, wear a band of pearls around your head.  The band may enable you to fix an elegant French twist.  Or, if you dress your hair in a pony tail during the day, loop it up into a mock bun for glamour-nights.  Cover the bun with a tiny cap of artificial flowers, or encircle it with a band of rhinestones. Straggly ends can be hidden by a sophisticated chignon and the dramatic effect of a Spanish comb.  

  • When you try out accessories in front of the mirror, don't' forget that your earrings must balance with the total effect of you.  Be sure that they're suitable for the mood, and that they fill the gap between the lobe of the ear and the edge or you hair.  Except for classic pearl earrings, irregular earrings usually are the more attractive than symmetrical ones.  The irregular lines will look airy and delicate, even though the earrings may actually be quite large.  If you want a severe hair style for evening, accessorize and dramatize it with large or unusual earrings. But if you are aiming for a fluffy, feminine style, don't make it fussier with an over-ornate earring.  Choose instead a simple style, perhaps of the button type.  Choose elaborate earrings to contrast with a simple hair style.  Intricate earrings add excitement and allure to a classic page boy, but too much glitter will spoil the effect of a carefully-designed, involved hair style.

  • For that very gala affair you're going to you'll really want to dazzle, and a formal evening out may call for a hair-do that falls just this side of the spectacular.  If you want a fabulous hair-do with clusters of curls or heavy twists or braids, add extra tresses - store-bought tresses - without any compunction.  Add a coronet or pony tail for a change in mood, but remember that the quick switch should still be you.  If you're very young, steer away from a sophisticated up-swept style, and if you've outgrown your bobby sox, don't coyly add a pony tail, or expect startled stares.  If you don't want to invest a week's pay in a few switches for a once-in-a-lifetime occasion, you'll probably buy one that is made of Dynel, a man-made fiber that looks very much like real hair.  You can, have a Dynel switch custom-blended of colors that are similar to your own.  If you want to tone down their gloss, rub a little talcum into it and you'll achieve a more natural look. 

  • A stick of lacquer will keep your hair in place all evening. Purse-sized, they're easy to carry, use.

  • You can set and dry your hair within 90 minutes.  Dryer stand frees your hands to apply make-up.
dolled up desirae

How to be Glamorous in 30 Minutes

This is the second installment in  the How to Be Glamorous series. Today we are covering 30 minutes.


  • Unless you have a dryer, don't dampen your hair in order to set it.  There may not be enough time for it to dry, especially if the weather is humid.  But, always give your hair that all important brushing, whether you have five minutes or thirty.  If you have extra time, add a head-vibrating massage, which will give you additional gloss and glow.
  • Next on the schedule is a quick set with a quick drying lotion.  They're not recommended for daily use, because they are usually made with a base that is drying to the hair, even when counteracted with lanolin.  But this is a time of emergency, and you should keep a bottle or can of your favorite brand on hand for just this moment.
  • Set and spray your hair in big pin curls.  Don't bother doing your whole head. Just pin up the curls that are necessary, probably two around the forehead, a couple behind the ears and a group across the back of your head.  Spray on the lotion and continue dressing.  Wait until the very last minute to come out your hair.  If you comb out after your dress in on, the pin curls will have had enough time to dry.  If you have a dryer fixed on a stand, sit by it while you apply your make-up or patch your nail polish so you're not wasting any valuable time.

  • If it's an evening date, how about adding some glitter?  It's quick to fix and if you do it with a delicate touch, the results will have an elusive allure.  Glitter comes in several forms:  Tiny sequin sparkles will twinkle like stars in your hair-do.  A fine powder of gold dust will shine subtly.  A few strokes with a gold stick will provide you with an iridescent streak that will last a day or two.  You can use the stick for a tantalizing "tipping" on the edge of your bangs, but gently does it!  For streaks, cute a hole in a cardboard, then push through the strands to be streaked.  The cardboard will protect the rest of your hair and eyes.  To fix the sparkles in your hair, spray on a lacquer first.  Then sprinkle on the sparkles with a not-lavish hand.  Seal with another swoosh of the lacquer.  Don't forget that on your hair a pinch of glitter will appear to be four times the amount.  Once fixed, leave the golden touch alone.  Brushing or combing may remove it altogether. 


Check back when I cover the last installment, How to be Glamorous in 90 Minutes.

How to be Glamorous in Minutes

As I have mentioned before, I'm not very good at pin curls. In order to overcome this handicap, I purchased a hair magazine from 1957. It has countless setting patterns and tips for hair care. This evening I plan on cutting my hair shorter, due to my heavily damaged ends, and am hoping that I will be able to follow some of the setting patterns as some of them seem pretty easy.

In the meantime, I'd like to share some of the fabulous articles found in the magazine. One such item is the cover article titled "How to be Glamorous in 16 Minutes." This is actually a series of articles also covering 30 minutes and 90 minutes. Unless you follow the vintage life, having permed hair and setting your hair regularly, I don't think every tip will work. But, this doesn't mean that there aren't little gems that can be used in modern life.

I will start off with 16 minutes. 


  • If your hair feels sticky and dirty, you can remove the dirt with a dry towel.  A dry rub is not as good as a dry shampoo for taking away the soot, but it will wipe off surface dirt, and give you a feeling of freshness.  Take a rough terry towel and place it over your head.  Now go to it with your hand, rubbing and massaging just though you were giving yourself a wet shampoo.
  • Give your hair a good brushing and a quick massage. 
  • Use the curling iron to fix any straggly ends.  Pin each curl and hold it temporarily in place with a clip.  Now take a double square of tissue (or end papers) and insert the curl into the folded tissue.  Hold onto the curl with your left hand, and take the curling iron into your right hand.  Gently heat the curl inside the tissue, holding it there for a few seconds until the heat penetrates.  Move the iron slowly up and down the paper.  Leave the curl alone for a few minutes until it has cooled off.  Then comb through separately.  Brush the curls into a set.
  • To keep your hair in place while you finish dressing, use a cosmetic cap - the kind used by professional models.  It looks like a supermarket sack, but it's made of nylon mesh.  Zip it up the front and it will envelop your entire head, keeping your make-up and hair-do in order.
  • Spray your hair lightly with lacquer, slip the cap over your head.  Later you'll emerge looking as though you came from the beauty parlor.
  • Cover your hair with a glamorous hat.  Keep a feather or jeweled cap in the closet for evening, a felt or straw head hugger for less formal occasions.
dolledup desirae

  • Shop for hair accessories that can be useful in turning a mare's nest into a marvelous hair-do when you've no time at all.  By holding your hair in place the sleekness that's the secret of glamour.  Many ornaments come on combs, while others are sticks or clips that keep your hair-do firm.
dolled up desirae


Check back later when I will cover How to Look Glamorous in 30 Minutes.

Resources For Learning How to do Vintage Hairstyles

As mentioned in the prior post, I didn't start doing my own hair until two or three years ago. Prior to that, I would either dress up with straight hair, or con someone else into doing my hair (usually my mother). When I moved farther away, I realized that I was going to have to learn how to do it myself. Fortunately, by this time there were lots of resources via the internet that weren't available in the mid to late 90s, when I first started collecting. I ate up what I could find whether it be bloggers, YouTube videos, or forums. I did not leave a stone unturned. I even reached out to a couple people whose hair I admired. I still have a lot to learn, but at least I can make myself presentable now. Below are some of the invaluable resources that tremendously helped me.

This publisher reproduces books on just about every topic, including hair. They have 1940s and 1950s hair styling books. I have added just about every book to my library. There storefront is on Amazon under Bramcost Publications. 

I also picked up old magazines and brochures where I could find them. Though, these are quite complicated for me, they give an idea of how original styles were structured. I even had a stack of old hairdressing magazines, but sadly, I had to sell them long before I started this blog. Most of what I have found since then has been uploaded and scanned with the label hair

The biggest learning experience I received was when I had my hair styled for the film my friends and I created. I presented the stylist with a booklet I ordered from Etsy. She tried to recreate the style that I had chosen. While she was working on my hair, I learn the great art of pinning my hair where I wanted it to be. I hadn't thought about using bobby pins prior to that. Now I rarely go out with out have 14 million bobby pins in my hair.

Vintage forums were a great help as well. There were two in particular that I often referred to. Those were The Fedora Lounge and Vintage Hair. Blogs were a help as well whether they were dedicated to vintage hair styles such as Vintage Flair.

And finally YouTube videos where I could actually see step by step how to set my hair were great. Two of my favorites are below. What are some of your hair styling resources?


Setting Solutions I've Tried

Styling my hair has been a real learning curve for me. I've never been that good at doing my hair. And, even after doing it myself for a couple years, I still don't do a lot of experimentation. I basically stick to the same sets with rag curlers or foam rollers. I keep telling myself that one day I'll try something different, but I rarely have time. Usually I set my hair when I need to go somewhere the next day. I don't have time to do something that won't work out. What I have tired, though, is different setting lotions - not many, but a few. I'm pretty lazy when it comes to my hair. When I first did my research, everyone was using Lottabody. But, I don't want to take the time to dilute anything. So, I tried another product.

Once again, I am lazy, and I tend to purchase most of my items online. Sally's Beauty Supply was the one place I knew had a variety of products. So, I looked at the website and picked out Proclaim Super Setting Lotion. Their schtick, which may be the same as Lottabody, is that it is supposed to improve the texture of your hair. I have fairly straight hair. It only has a slight wave to it, which is mostly noticeable when it is shorter than my shoulders. It likes to flip up no matter what I do. But, it also doesn't like to keep a curl. Growing up, my hair would be almost flat by the end of the day. And, a heated set never stays more than a couple of hours. So, even though I hadn't used any other setting solutions, I was pretty impressed with how my hair held with Proclaim. Also, my hair stayed soft, no matter how much solution I put in my hair. 


This came in quite a large bottle. It lasted me a good year. But, the time came when the bottle became close to empty, and I knew I had to go to buy more. This time I decided to go to the store. I looked for Proclaim, but couldn't find it. So, I settled on another one that looked similar. It was called Ultra Sheen. 


Again, it does not have to be diluted. It also says that it is supposed to improve the structure of your hair. By now, my hair was remembering that it was supposed to curl, and my curls were lasting longer. But, I wasn't as happy with this solution as I had been with Proclaim. Despite the fact that my hair was getting used to being curled, my curls became a bit droopy by the end of the day - not completely, but definitely not as tight as they would have been with Proclaim. I also noticed that if I put too much in my hair, or if I put it in my hair dry, my hair would be a bit crunchy when I took my setting out, though it did become soft after it was brushed. Even with over half a bottle left, I decided to try something else.

I looked at Sally's online again, and picked out one that had a good review by someone who does vintage styles with their hair. I decided to go to the store since I would be in the area. The product is called Elan and is made by Wella, but they didn't have it in the store. So, I decided to try Motions, since I have heard other vintage girls like it. 


I chose the extra firm hold and put a generous amount in my hair. The next morning, my bangs looked a little greasy. So, I guess next time I shouldn't put as much solution in my hair. But, the hold was comparable to Proclaim. The setting seemed a little tighter at first, but relaxed a bit after a couple of hours. . I was very disappointed, though, in the next day. I typically don't get more than one day out of my set because I put so much hairspray in my hair it is impossible to comb out. But, with Proclaim, I could get another day, if I really tried. The day after using Motions, my curl had relax so much that I was left with barely any curl. 

Out of the three, I like Proclaim the best. I would still like to try Elan. So, anyone has tried it, I'd love to hear what you think. Or, if you have any other recommendations, I'd love to hear those too.


Setting My Hair to Get Some Sleep

I've been apprehensive about doing a hair tutorial as I feel like I know far less than the other lovely vintage bloggers out there. But, I've come across a couple things lately that have encouraged me to give it a shot. I set my hair in many various ways. I'm not great with my pin curls, though. I haven't had a lot of time to practice them. So, I usually take the easy way out - curlers. The type of curlers I use is dictated by the type of curl I am after. A lot of times, it also depends on what I plan on wearing. A third consideration is how much sleep I need. I have found that though bobby pins are fairly easy to  sleep in, I still wake up with the pins poking my head. 

Many times the method I use is rag curlers, or in my case sock curlers. They are very pliable, which makes sleeping in them quite easy. They do give me a looser and less full curl. So, I rarely am able to pin up the set for a more typical 50s look. Below is a step by step on how I set my hair in socks. I hope you find this tutorial useful. Please, feel free to leave me comments or suggestions. 

Setting hair using socks.

The hair needs to be almost completely dry or the hair will still be damp in the morning. There are two ways I start my hair depending on whether I need to wash it. Sometimes I wash my hair, spray it with my setting solution, and then blow dry it until it is almost dry. If I do not need to wash my hair, I start off with dry hair, and spray each section with setting solution.

I start off by sectioning off the front part of my hair, between my temple and my ear. I use this amount as a guide for the rest of the sections. If you want more of a wave, then more hair can be sectioned off. 


I cannot get my ends to behave. No matter how I try to set my hair, or how my hair is cut, I get stubborn ends that stick out. So, I use perm or end papers to keep them under control. For this example, I had washed and dried my hair. So, I typically dampen the end papers before placing them on the hair. I wrap the ends around the center part of the sock.


I then roll my hair up (under) to the crown of my head. I suppose you can roll your hair outward, though I have never done it this way.


When I get to the top, I tie the sock in a knot over my hair. I continue to the next section, typically switching from the left side of my head to the right side until I meet in the back. 


For this example, I did the first front section in one row, the second front section in two rows, and the rest in three rows from the top of my head to the nape of my neck. 


sock, rag, curlers, hair setting, easy, tutorial, vintage, 1950s, 1940s


I look a little like Medusa when I am finished. I do not bother to cover my hair in a scarf. The socks hold my hair well, and the length of my hair does not require any extra support.


If my hair was dry enough when I set it, I don't have to worry about the curls being damp. I untie the socks with ease and much faster than taking out pins or curlers.


I don't spend a lot of time brushing out my hair, since I typically don't have a lot of time. Most often for this set all I need to do is brush it out and spray it with hairspray.


Viola. All done. Since I have fine hair, a wet set holds better in my hair than using heating styling tools. I do find that if I don't pin my hair, this style will loosen a bit over time, but even by the next morning I still have quite a bit of curl in my hair. Again, I would love to know what you think. Feel free to leave me a comment below. 


Paul Mitchell Clipless Ion Curling Iron

My stylist told me about a new curling iron he picked up that worked well on straight hard to curl hair. Other girls in the salon had used it on their hair, and had good results with the curl staying. He wanted to try it on my hair. After quite some time, we were finally able to try it out today. The iron is a Paul Mitchell Pro Tools Clipless Express Ion Curl iron (whew that's a long name).


Since the iron is clipless, the hair is wrapped around the iron and held with the fingers. The barrel is tapered, but unlike most clipless irons, the barrel is bigger on the top. He took very small sections of my hair and wrapped it around the iron with the top of the iron pointed down. So, the curls were tighter at the top and looser at the bottom. 


When we first started doing it, I looked like I had just stepped out of the 1990s and was about to go to prom. He didn't brush it out, but rather used his fingers to loosen the curl. We didn't have much time to play with it after the curling was done. 

My hair usually doesn't stay with a hot set. Typically after just a couple hours, it is barely noticeable that my hair was ever curled. Though the curl did loosen with the Paul Mitchell iron, it was still curly hours later. I did finally brush it out, and the curl turned into a deep wave that I think would look even nicer if I were to sleep on it. 

I think this is a good tool to get waves that last. I'm sure had bigger sections been used, my waves would have been bigger as well. I do like that I had much more volume to my hair than if I had used a traditional iron. This is a big plus. Now for some before and after shots.


BEFORE
This is how my hair looks basically rolling out of bed. My hair has a bit of a wave because I went to bed with it wet. 


AFTER
This is what it looked like without much mussing. He finger combed some of it, but we did not brush it out. (Forgive the background butt shot. I tried to crop out as much as I could, but it was kind of just right there.)


This is after several hours, and brushing it out. You can see that much of the wave is still in tact.


If you want a new hair style...

A few posts ago I mentioned that I was able to go through an attic full of old things. Some of the things I bought were stacks and stacks of old magazines. If you haven't noticed yet, I use these old magazines for my Tumblr account, which is full of old ads that I have scanned from these sources.

Flipping through one of these magazines from 1953, I came across setting instructions that of course I have to share. The instructions are below.

Cutting: When just the right amount of length and weight has been removed from the hair, most women have a natural wave - enough so they can set their own hair with just a little help from a soft permanent.  Hair should be thinned enough at the crown and the back to reveal the contour of the head.

A good average length for today's hair styles is about three to four inches all over the head, perhaps a little shorter at the neck.  When you cut every section except the nape (and possibly the temples), use long strokes so the hair will fit against the head. In the nape section the hair can be cut with blunt ends so the permanent will not become frizzy and the setting will hold its shape between shampoos.

Setting:  A pin-curl permanent gives the soft loose curl needed for casual hair styles.  The desired setting can be followed when the permanent is put in.  The pin curls should be properly placed to give you curl exactly where you want it.  Where the hair is thin, you need more and smaller curls; where the hair is thick, fewer and larger curls.

Comb-outs: The glamour treatment starts with a side part.  The crown is combed smooth and held flat while all the hair (with the exception of the fringe curls) is brushed back off the face into a halo of soft curls that sweep into a feathery cluster at the crown.  Large curls at the front break into a deep wave that is feather-dipped over the left eye.  Fringe curls are brushed forward over the ears.

The casual treatment has the side part brushed out; the smooth area where the part usually appears draws the eye along the line of the head.  To achieve this look of causal nonchalance, the hair must be brushed back thoroughly all over the head so that the strands mesh and hold their place and the line looks soft and unstudied.  The forehead wave is dipped slightly to soften the severity of the hair line.


Side setting: Beginning at the part, set a row of four backward-turning pin curls.  Behind them, set two rows of pin curls that turn upward and forward.  Setting is the same for both sides.

Back setting:  With the ends of the hair combed down from the crown, make a row of four or six large pin curls, turning them toward the center on each side so they will make a slight drake's tail when brushed out. With the nape hair make one or two rows of curls, turning them upward and toward the ears on each side.

Top setting: Comb a slight wave into the forelock.  Turn these ends into a row of three large forward-turning pin curls to make the deep forehead wave.  Behind these, set three rows of forward-turning curls.

The silhouette should make a smooth curve.  The feather dip of the forehead wave softens the hairline.