
I've been apprehensive about doing a hair tutorial as I feel like I know far less than the other lovely vintage bloggers out there. But, I've come across a couple things lately that have encouraged me to give it a shot. I set my hair in many various ways. I'm not great with my pin curls, though. I haven't had a lot of time to practice them. So, I usually take the easy way out - curlers. The type of curlers I use is dictated by the type of curl I am after. A lot of times, it also depends on what I plan on wearing. A third consideration is how much sleep I need. I have found that though bobby pins are fairly easy to sleep in, I still wake up with the pins poking my head.
Many times the method I use is rag curlers, or in my case sock curlers. They are very pliable, which makes sleeping in them quite easy. They do give me a looser and less full curl. So, I rarely am able to pin up the set for a more typical 50s look. Below is a step by step on how I set my hair in socks. I hope you find this tutorial useful. Please, feel free to leave me comments or suggestions.
Setting hair using socks.
The hair needs to be almost completely dry or the hair will still be damp in the morning. There are two ways I start my hair depending on whether I need to wash it. Sometimes I wash my hair, spray it with my setting solution, and then blow dry it until it is almost dry. If I do not need to wash my hair, I start off with dry hair, and spray each section with setting solution.
I start off by sectioning off the front part of my hair, between my temple and my ear. I use this amount as a guide for the rest of the sections. If you want more of a wave, then more hair can be sectioned off.

I cannot get my ends to behave. No matter how I try to set my hair, or how my hair is cut, I get stubborn ends that stick out. So, I use perm or end papers to keep them under control. For this example, I had washed and dried my hair. So, I typically dampen the end papers before placing them on the hair. I wrap the ends around the center part of the sock.

I then roll my hair up (under) to the crown of my head. I suppose you can roll your hair outward, though I have never done it this way.

When I get to the top, I tie the sock in a knot over my hair. I continue to the next section, typically switching from the left side of my head to the right side until I meet in the back.

For this example, I did the first front section in one row, the second front section in two rows, and the rest in three rows from the top of my head to the nape of my neck.

I look a little like Medusa when I am finished. I do not bother to cover my hair in a scarf. The socks hold my hair well, and the length of my hair does not require any extra support.

If my hair was dry enough when I set it, I don't have to worry about the curls being damp. I untie the socks with ease and much faster than taking out pins or curlers.


I don't spend a lot of time brushing out my hair, since I typically don't have a lot of time. Most often for this set all I need to do is brush it out and spray it with hairspray.


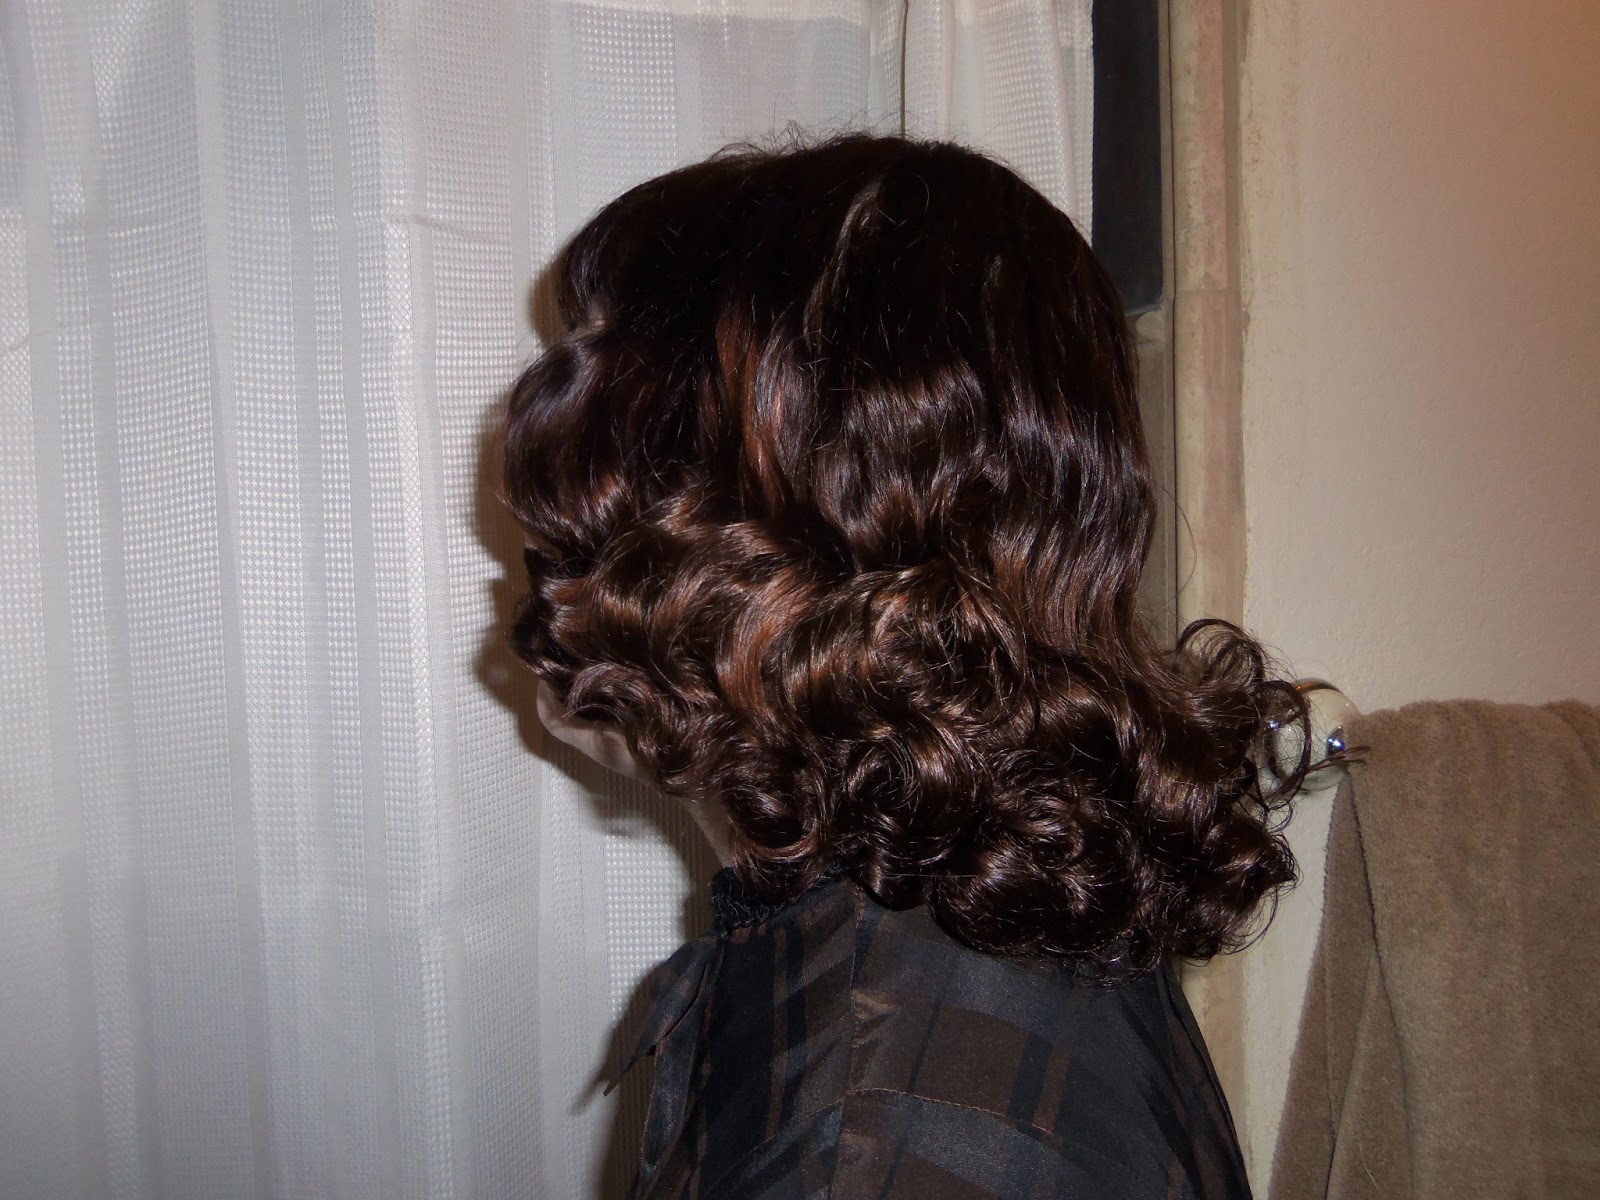
Viola. All done. Since I have fine hair, a wet set holds better in my hair than using heating styling tools. I do find that if I don't pin my hair, this style will loosen a bit over time, but even by the next morning I still have quite a bit of curl in my hair. Again, I would love to know what you think. Feel free to leave me a comment below.
Oh honey, your hair looks so, so gorgeous! Fantastic tutorial! My real hair was fine and bone straight and would only hold a wet curl, and I used to use rag curls often (second only to pin curls). Thank your sharing your tried-and-true technique, the outcome was/is wonderful!
ReplyDelete♥ Jessica
fantastic! Never thought about that, thanks for the tutorial! Gotta go buy some socks ;)
ReplyDeleteThank you! I was pretty nervous about posting it. I'm glad that it was actually helpful
ReplyDeleteWow, great job on this tutorial!! I'm definitely gonna try it out. My hair is slightly longer than yours, so do you think it will work? Also, I'm wondering, why did you choose to use socks instead of smaller rag ties? Does the thicker sock material provide a better/different look? Thanks again for doing this!
ReplyDeleteThere are several reasons why I like the socks. I feel like I get a standard size curl throughout. Also, I like the thickness of the socks. I guess I could cut a rag to the size I wanted, but this seems much easier. I can also just use the socks in my drawer. Plus, the stretchiness of the socks seems easier to tie (though that might be in my imagination).
DeleteYeah! So good. And how fun that you show us how you use socks. At first I thought it was some english word for a special tool but then I saw that it really was socks! Love those kind of tips, will definitely try this when I find some time!
ReplyDeleteXO, Simona
If you try it, let me know how it works for you.
Delete